Though I managed to lose the documentary videos and pics of how I made these boards from start to finish, I DO have one board about ready. I plan on making a video on how I finished the boards, but that will have to wait until warm weather, since I will be using clear resin for the river/water effects. Still, here are some ideas of what I have been doing for this…
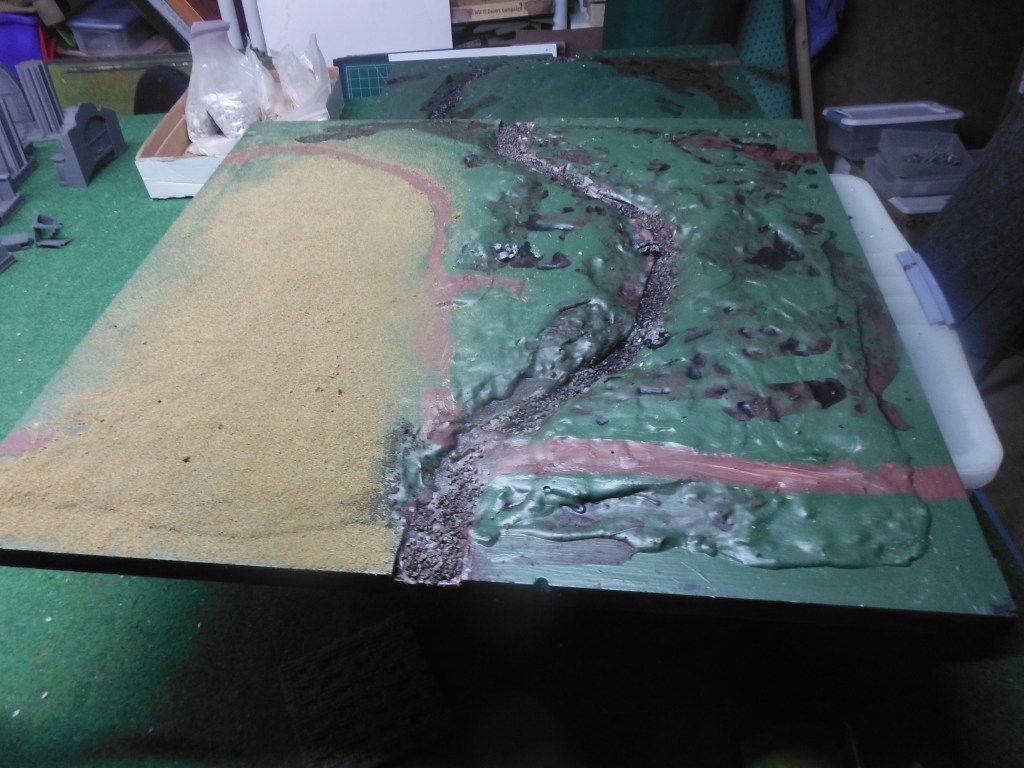
I put these together, as 2×2 foot squares. The rivers link up at the center of the boards and roads at the corners. I put together a 2×2 frame out of high quality 1×2 inch boards. These I then mounted on a MDF backing. Next I glued on cut Styrofoam as the basic forms of the terrain. The covered this all with water putty. The drying for that took about a week. Then I covered it all with a heavy coat of green acrylic paint. The 8 boards I made have been sitting on the rack with casters I build since October. I now have time to tackle each board, one at a time, with all the details except for the actual resin for water.
I will document details as I go.
Here are some samples of the boards, so far:

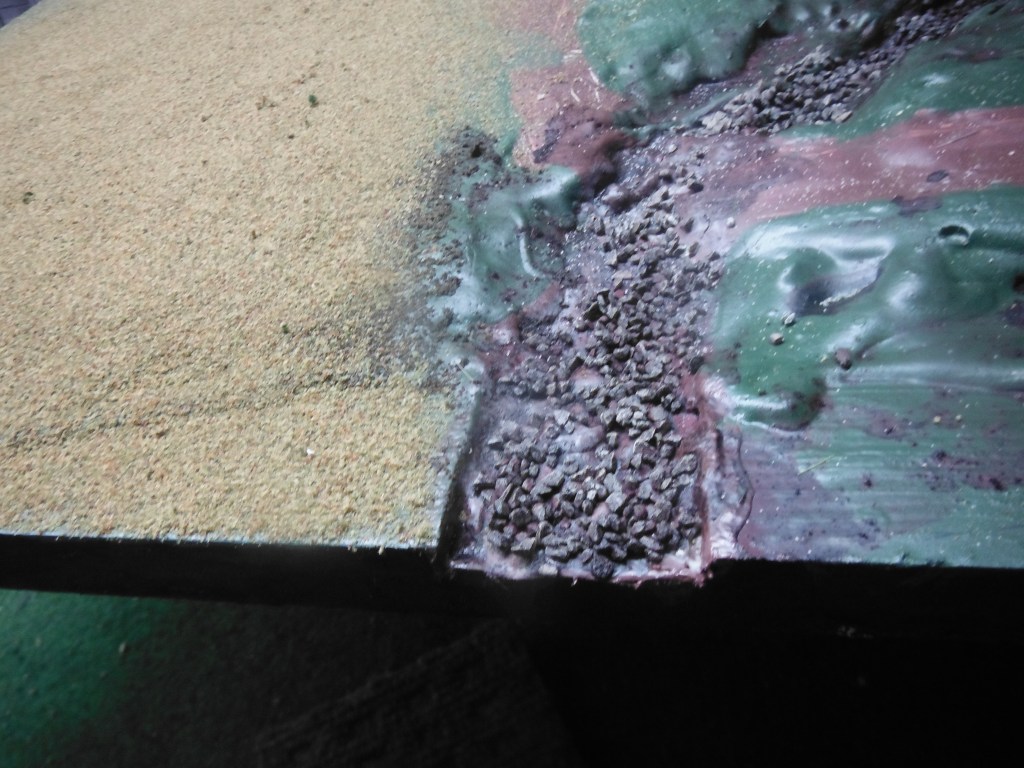
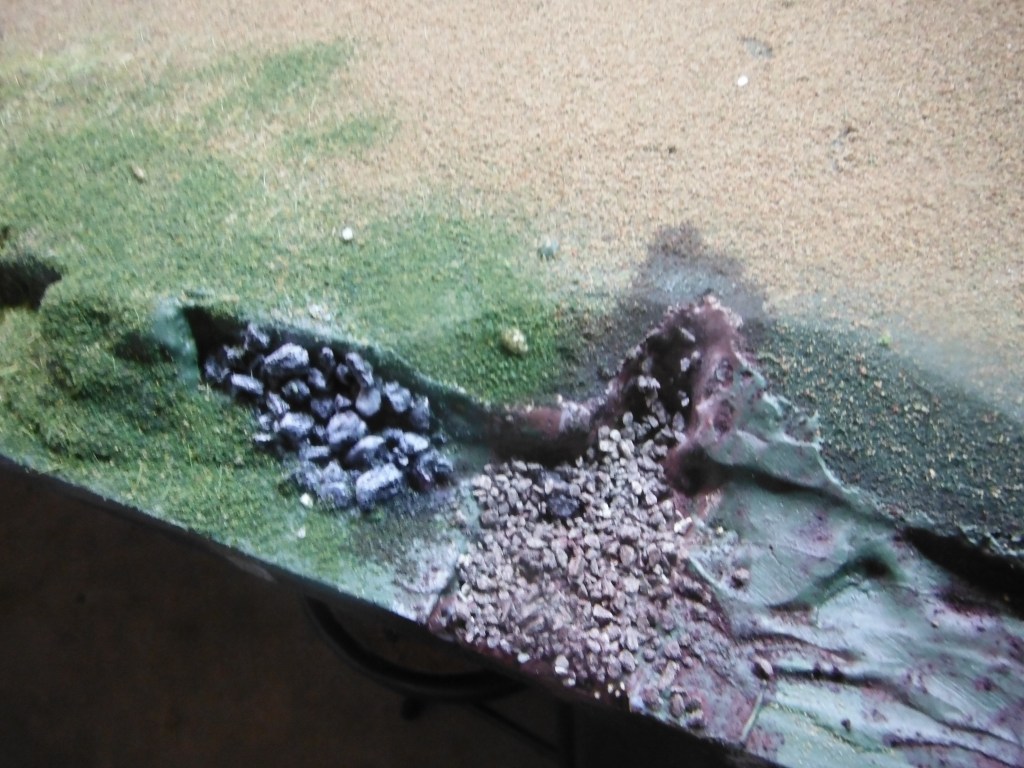
I painted on the roads. For the river beds I used PVA glue to hold small rocks (really cheap aquarium rocks from the large pet store that came in a gallon tub for about 2 Dollars). I added some coarse sand with PVA glue. After drying, I washed the rivers with a heavy brown/green wash, following up with a more brown wast for the rest of the board.
Some of the boards have short, cut off roads and rivers. That allows me to connect boards in various directions.
I painted those larger aquarium rocks black and drybrushed these with greys of different sorts.
I got a cheap spray bottle from the local hardware store. I mixed up some PVA with water and heavily coated the board, about a quarter of the board at a time. Then I used as manual flocking gun (I will show one of those later sometime) to evenly cover the area I had sprayed glue on. I let that dry for a few days, then sprayed over the flocking with the PVA mix, soaking it well. This helps keep the flocking secure. Once I am done with that quarter of the board, I go to the next one.
The edges are all the same, uniform height since the 1×2 inch boards are the frame. I did that to secure the edges so they resist damage and slide next to each board better. I use that spray bottle on those boards last to cover the edges, trying to match all the board edges as best I can. I vary the flocking colors a bit. I also add some static grass with a static grass applicator (there are lots of online videos on how to do this) here and there. Once I have completed the resin river water, I will add that sort of static grass to the river banks.
A nearly completed board:
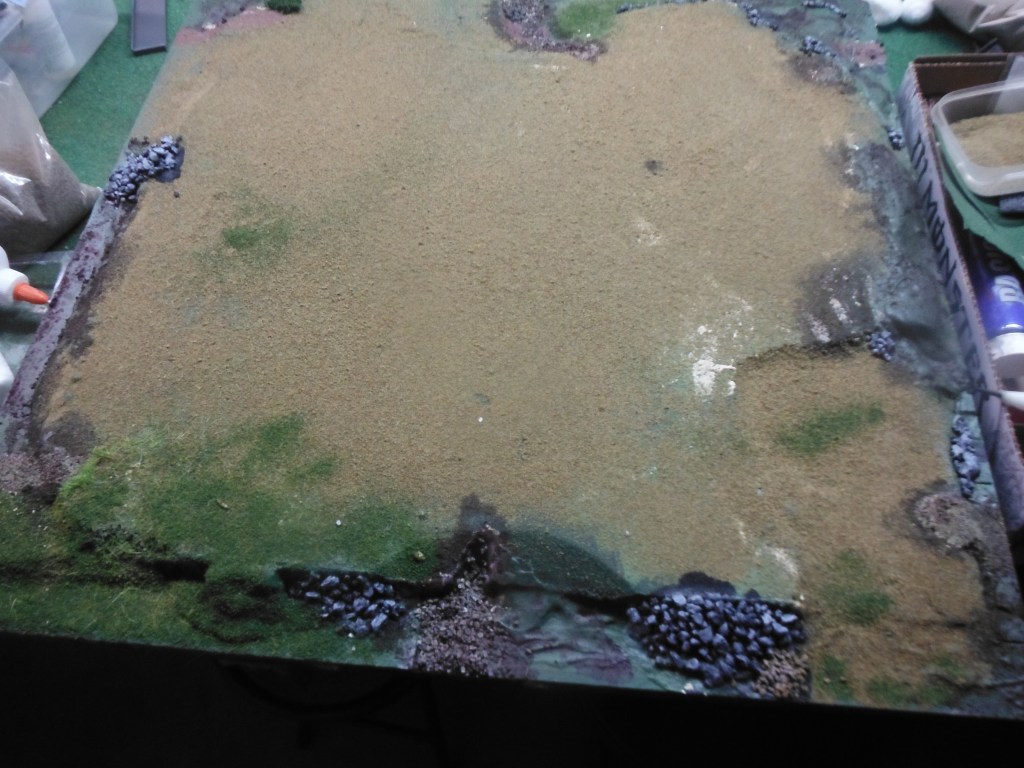
This one is more flat. I tried to vary each board so the effect is a variety. The terrain is not completely authentic looking as it would be with a train layout or formal diorama. The more ‘gaming’ look is necessary for the miniatures games I envision. These boards will be useful for games up to 15mm scale, though I want to mostly use 10mm and microarmor scales on these.
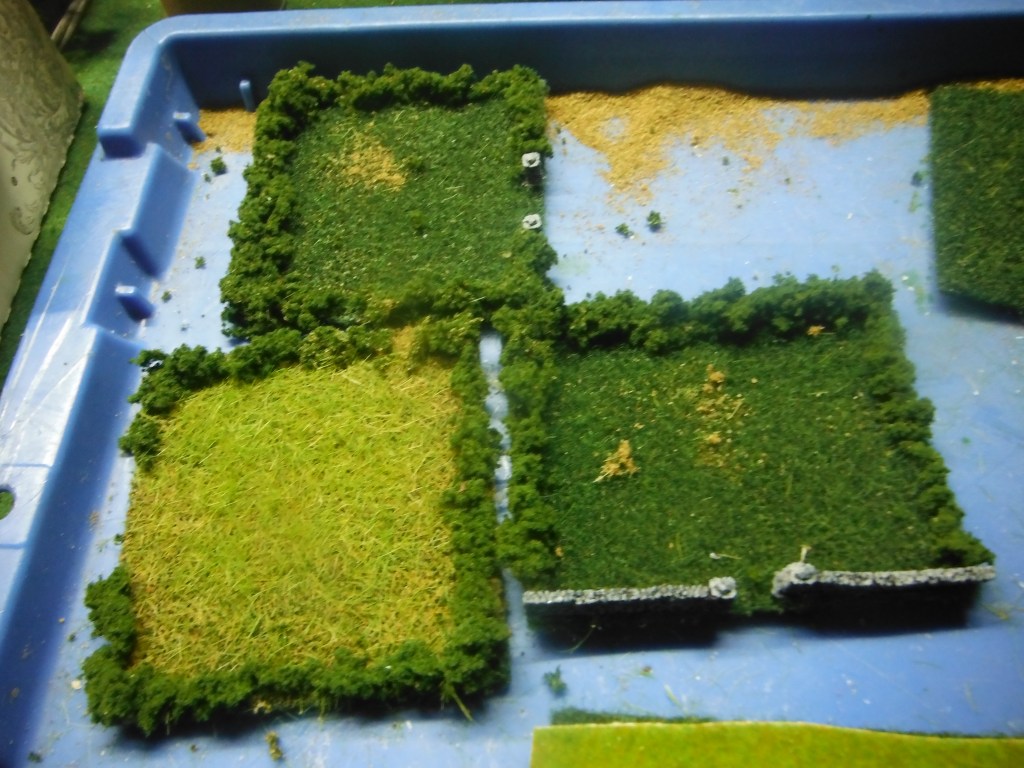
I also made some hedge-lined fields. The 15mm versions use cut felt sheets, some 8×8 inches, and others larger in dimensions. I line the edges with cut scrubbing pads, which are green and come in bundles of 5 or 10 at the discount store. I cut them into strips and glue them down on the felt. Then I garnish these with train layout scenery foliage. The reason I use the felt is it remains flexible and conforms to rolling terrain. It works great.

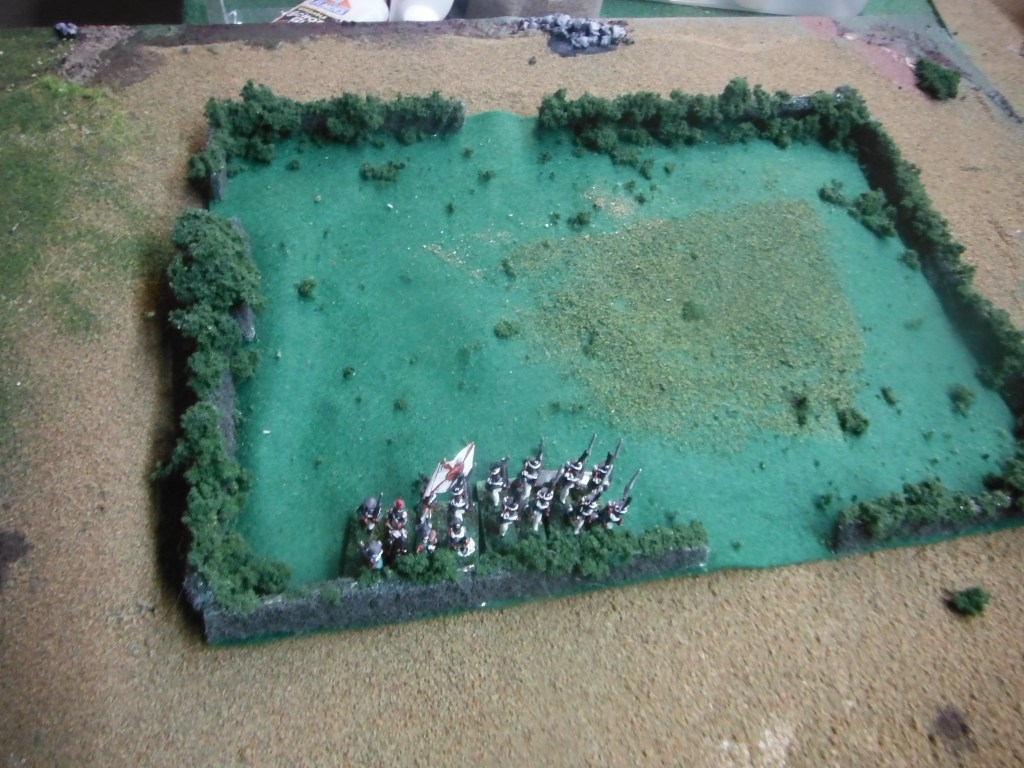

But for microarmor, or 10mm scales, this is too out of scale for the look I am after:

So I went to a big box home building store and got a bunch of free sample squares from the carpet department.

I then garnished these with the same model train foliage and added some tiny wall sections for a gate looking effect.
This works great for microarmor scales and 10mm…
